
—
How to Cut Porcelain Floor Tiles
Embarking on a DIY project to enhance your outdoor space with porcelain tiles can be exciting and challenging, especially when mastering how to cut porcelain floor tiles.
At Ovaeda, our years of expertise have taught us the importance of precision and the right approach to handling these durable yet delicate materials.
This article aims to guide you through the essential tools and materials needed, preparatory steps before cutting, and detailed methods for using various cutting tools such as angle grinders or electric cutters.
Additionally, we'll delve into the benefits of choosing porcelain tiles for your outdoor areas, ensuring you're well-equipped to achieve that flawless finish with confidence.
What this article covers:
- Required Tools & Materials
- What to Do Before You Start Cutting Your Tiles
- How to Cut Porcelain Floor Tiles Using an Angle Grinder
- How to Cut Porcelain Floor Tiles Using an Electric Cutter
- Benefits of Porcelain Tiles
Required Tools & Materials
Before we get our hands dirty, let's make sure we have all the right tools and materials on deck. After putting it to the test, we've found that you'll need:
- A high-quality electric wet saw, or
- An angle grinder with a diamond blade, or
- A scoring tool
- Safety gear: goggles, gloves, and ear protection
- A measuring tape and a pencil
What to Do Before You Start Cutting Your Tiles
Before you start cutting, there's a bit of prep work to do. According to our research and experience:
- Measure twice, cut once: Ensure your measurements are spot on.
- Mark your tiles using a scoring tool or a pencil for visibility.
- Set up your cutting area in a well-ventilated space, preferably outdoors, to manage dust.
- Ensure your cutting tools are in good condition, with sharp blades for a clean cut.
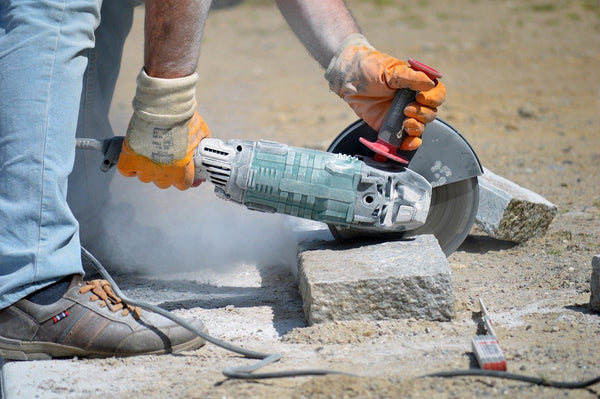
How to Cut Porcelain Floor Tiles Using an Angle Grinder
Step 1: Secure The Tile
Before you start, make sure your porcelain tile is firmly fixed on a stable surface. This prevents any movement during cutting, reducing the risk of chipping or breaking. A workbench with clamps or non-slip matting on a solid floor can be effective in keeping the tile steady.
Step 2: Mark Your Tile
Accuracy is paramount when cutting porcelain tiles, and it all starts with a clear, precise mark. Using a straight edge and a pencil or a tile marker, draw the line where you intend to cut.
This line serves as your guide, so it's important to double-check your measurements to ensure it's exactly where you need to make the cut. A visible, straight line will be your roadmap for the angle grinder's blade.
Step 3: Prepare The Angle Grinder
Before attaching the blade to your angle grinder, ensure it's designed for cutting porcelain tiles to achieve a smooth, precise cut. Once you've selected the appropriate blade, securely attach it to the grinder, ensuring it's tightly fixed to prevent any wobble or dislodgement during the cutting process.
Step 4: Use The Angle Grinder To Cut The Tile
With your safety gear on, align the diamond blade of the angle grinder with the marked line on the tile. Turn on the grinder and let it reach its full speed before you start cutting. Gently guide the blade along the marked line, applying steady and even pressure.
It's important to let the blade do the work without forcing it, as pushing too hard can cause the tile to chip or break. Keep a steady hand and maintain a consistent speed for a clean cut.
Step 5: Smooth The Edges
After successfully cutting the tile, you'll likely find that the edges are a bit rough. To achieve a neat, professional finish, use a rubbing stone to smooth out the edges. Gently run the stone along the cut edges, applying light pressure to avoid chipping.
This final touch will improve the cut's appearance and ensure the tile fits perfectly in place, contributing to the overall aesthetics of your outdoor space.
How to Cut Porcelain Floor Tiles Using an Electric Cutter
Step 1: Prepare The Cutter
Before you start cutting, it's important to fill the electric cutter's water reservoir. This water is crucial as it keeps the diamond blade cool during the cutting process, reducing the risk of overheating and potential damage to both the blade and the tile.
Step 2: Mark And Align
Just like with the manual cutter, you'll need to mark your tile where you intend to cut. Once marked, place the tile under the electric cutter's blade, aligning the blade with your marked line. Take your time to ensure the tile is positioned correctly for a precise cut.
Step 3: Cut
Now, gently push the tile into the blade, letting the electric cutter do the heavy lifting. There's no need to force the tile; the blade is designed to cut through the porcelain with ease. Keep a steady hand and maintain even pressure as the blade slices through the tile.
Step 4: Finishing Touches
After cutting, give the tile a moment to dry off from the water used during the cutting process. Once dry, you may notice some roughness along the cut edge.
Use a tile stone or sandpaper to smooth these out, just as you would with a manually cut tile. This final step ensures your tile is ready to be placed, contributing to a beautifully finished porcelain floor.
Benefits of Porcelain Tiles
Durability
Our outdoor porcelain tiles stand out for their exceptional durability. Crafted from dense clay and fired at high temperatures, they possess a robustness that makes them resistant to wear and tear.
This inherent strength ensures they can withstand the hustle and bustle of high-traffic outdoor areas without showing signs of distress.
Whether it's a bustling patio or a garden walkway, porcelain tiles retain their integrity and appearance, making them a long-lasting choice for any outdoor setting.
Low Maintenance
One of the most appealing aspects of porcelain tiles is their low-maintenance nature. Their dense composition and smooth surface prevent dirt and stains from penetrating, making cleanup a breeze.
A simple sweep and occasional mopping with mild detergent are all it takes to keep your outdoor spaces looking pristine. This ease of maintenance not only saves time and effort but also ensures your outdoor areas remain a beautiful and welcoming extension of your home with minimal upkeep.
Weather Resistance
Porcelain tiles are uniquely equipped to handle the rigours of outdoor environments, thanks to their impressive weather resistance.
Capable of enduring extreme temperatures, from scorching summers to freezing winters, they remain unscathed and retain their aesthetic appeal through all seasons. Additionally, their low porosity prevents water absorption, reducing the risk of cracking during freeze-thaw cycles.
Aesthetic Appeal
Beyond their practical advantages, porcelain tiles offer a wealth of aesthetic possibilities. Available in an extensive array of designs, colours, and finishes, they provide the flexibility to complement any outdoor decor style, from classic elegance to modern minimalism.
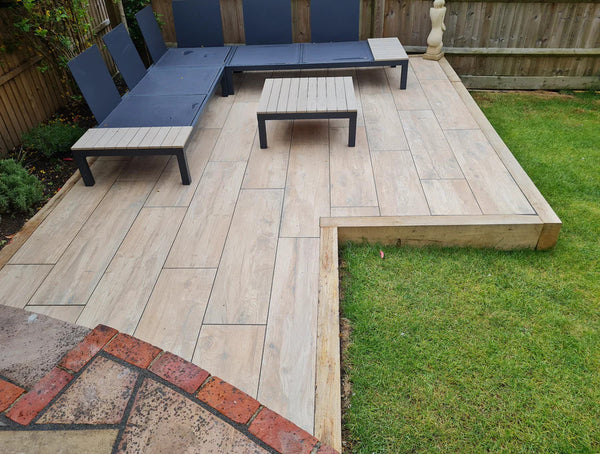
Whether you're aiming for the natural look of stone, the warmth of wood, or the sleekness of polished concrete, porcelain tiles can achieve the desired effect.
Conclusion
Mastering the art of cutting porcelain floor tiles can significantly elevate the aesthetics and functionality of your outdoor space.
Remember, the key to a flawless finish lies in meticulous preparation, precise scoring, and gentle handling, followed by a thorough smoothing of the edges to ensure a professional look and safe installation.
As you embark on this DIY journey, consider Ovaeda as your go-to source for high-quality porcelain paving. Explore our range today and take the first step towards bringing your outdoor tiling vision to life.
Did our blog meet your needs? You might also find our other guides helpful:
- Weight of Porcelain Tile
- Best Porcelain Tiles
- Porcelain Tiles on Pedestals
- Benefits of Porcelain Tile
- What Gap Between Porcelain Slabs?
- Laying Porcelain Slabs on Sand
- How to Lay Porcelain Tile on Concrete Floor
- Can You Lay Porcelain Slabs in Winter?
- Types of Balustrade
- Fitting Balustrade
- Balustrade Distance Between Posts
- Glass Balustrade Ideas
- Balustrade Height UK
- Balustrade and Handrail
- Banister vs Balustrade