
We understand the transformative power of laying porcelain slabs on sand in outdoor spaces, blending durability with aesthetic appeal.
This method not only offers a practical solution for enhancing patios, pathways, and garden areas but also introduces an element of design versatility that caters to diverse tastes and preferences.
Throughout this article, we'll delve into the feasibility of this approach, the benefits of using sand as a base, the suitability of porcelain slabs for outdoor environments, and the optimal type of sand for such projects.
We aim to equip you with the knowledge and confidence to embark on this DIY journey, ensuring a seamless integration of style and functionality in your outdoor living areas.
What this article covers:Can You Lay Porcelain Slabs on Sand?
Absolutely! Laying outdoor porcelain tiles on sand is a fantastic option for many outdoor spaces. From our experience, this method provides a sturdy, beautiful surface that's perfect for patios, pathways, and more.
What Makes Sand A Good Base For Porcelain Slabs?
Sand is a forgiving, flexible base that allows for easy adjustments and drainage. It's perfect for those who might want to tweak their design in the future. Plus, the natural drainage properties of sand ensure that your beautiful porcelain slabs remain unaffected by water damage.
Are Porcelain Slabs Good For Outdoor Flooring?
After putting it to the test in various settings, we can confidently say that porcelain slabs are exceptional for outdoor flooring. They're durable, low maintenance, and come in a plethora of designs to suit any taste.
What Type Of Sand Should You Use For Porcelain Slabs?
Sharp sand is your best bet. It compacts well while still allowing for proper drainage, creating the ideal bed for your porcelain slabs.
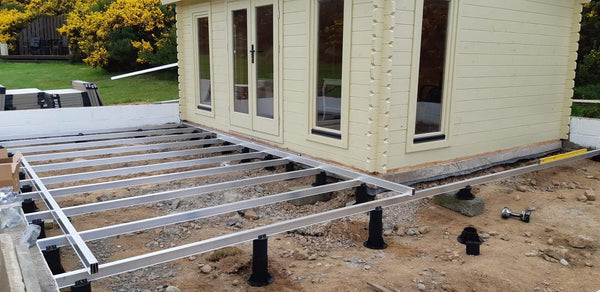
How to Lay Porcelain Slabs on Sand
Required Tools & Materials
- Porcelain paving slabs
- Sharp sand
- Sturdy rake
- Spirit level
- Rubber mallet
- Spacers
Step 1: Plan Your Layout
Embarking on your outdoor transformation begins with a well-thought-out design. Sketch your vision, taking into account the natural pathways through your garden or patio and how each area will be utilised.
Whether it's a cosy corner for reading, a spacious area for dining, or a clear path weaving through your garden, this blueprint stage is pivotal. It's not just about aesthetics; functionality plays a key role in ensuring your space meets your lifestyle needs.
This foresight streamlines the installation process and also ensures efficient use of materials. It also helps you account for any weather challenges, such as laying porcelain slabs in cold weather.
Step 2: Prepare Your Base
A solid project foundation starts with a clean slate. Remove any plants, roots, rocks, or debris that could compromise the stability of your porcelain slabs.
Once cleared, distribute a uniform layer of sharp sand across the designated area, aiming for a thickness of approximately 30-50mm. This layer acts as a cushion for the slabs and aids in drainage.
Using a rake, smooth out the sand to eliminate any bumps or dips, creating a level surface that will support your slabs evenly.
Step 3: Compact The Sand
Compaction is key to preventing future shifting or sinking of your slabs. Achieving a firm base can be as simple as walking over the sand with a wide plank underfoot to distribute your weight evenly.
For larger areas, a garden roller can be an efficient tool to ensure the sand is compacted uniformly. This step is crucial in creating a stable foundation that will uphold the integrity of your porcelain slabs over time.
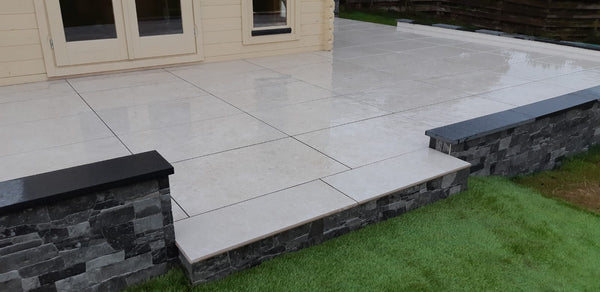
Step 4: Lay Your Slabs
With your base ready, it's time to bring your design to life. Starting from one corner, carefully place your first porcelain slab onto the sand. Ensure there's a gap of about 15mm between it and the next slab to allow for water drainage and natural expansion.
As you lay each slab, gently tap it with a rubber mallet. This ensures the slab is bedded into the sand without damaging its surface. Work systematically across the area, keeping an eye on your design to ensure it unfolds as planned.
Step 5: Level As You Go
As each slab is laid, it's imperative to check its levelness. In our experience, a spirit level becomes your best friend in this step, helping you maintain an even surface across your outdoor space.
If a slab sits too high or too low, adjust the sand beneath it until it's perfectly aligned with its neighbours. This attention to detail ensures a smooth, trip-free surface that's visually pleasing and functional.
Step 6: Fill the Gaps
The final touch involves securing your slabs in place by filling the gaps with sharp sand. This not only locks the slabs together but also deters weed growth between them. Gently sweeping sand into the gaps and compacting it ensures a neat finish.
Over time, you might need to top up these gaps as the sand settles, maintaining the pristine look of your outdoor area.
Conclusion
Laying porcelain slabs on sand is not only a feasible project but also an opportunity to elevate your outdoor space with a touch of elegance and durability.
This guide has walked you through the essential steps, from choosing the right type of sand to the precise laying of porcelain slabs, ensuring your outdoor area is transformed into a beautiful and functional extension of your home.
With the right approach and materials, you can achieve a stunning result that lasts for years. If you're ready to embark on this rewarding DIY project, explore Ovaeda's range of high-quality porcelain slabs and make your outdoor vision a reality.
If you want to learn more, why not check out these articles below:
- How to Lay Porcelain Tile on Concrete Floor
- Weight of Porcelain Tile
- Best Porcelain Tiles
- Porcelain Tiles on Pedestals
- Benefits of Porcelain Tile
- What Gap Between Porcelain Slabs?
- Balustrade
- Types of Balustrade
- Fitting Balustrade
- Balustrade Distance Between Posts
- Glass Balustrade Ideas
- Balustrade and Handrail
- Banister vs Balustrade
- Glass Balustrade Building Regulations UK
- External Balustrade Building Regulations UK