
Embarking on the journey of fitting balustrade can transform your outdoor space, adding both elegance and safety. In this article, we'll into the essential steps and tools required for the task, guiding you through planning, preparation, installation, and the finishing touches that bring it all together.
With a focus on materials such as composite, glass, and stainless steel, we aim to equip you with the knowledge and confidence needed to undertake this rewarding DIY project.
Whether you're a seasoned DIY enthusiast or a newcomer to the world of outdoor enhancements, understanding the process of fitting a balustrade is key to achieving a successful outcome.
What this article covers:Fitting a Balustrade: Step-By-Step Guide
Required Tools & Materials
Before we get our hands dirty, let's make sure we have everything we need. From our experience, the following tools and materials are essential:
- Tape Measure And Pencil: For accurate measurements.
- Spirit Level: To ensure everything is perfectly level.
- Power Drill And Screwdriver: For secure installations.
- Power Saw And Hacksaw: To cut materials to the right size.
- Non-Marking Mallet: For gentle persuasion.
- Protective Gear (PPE): Safety first with gloves, goggles, and ear protection.
- Outdoor Balustrade Components: Posts, handrails, spindles, and glass panels, depending on your chosen material.
Step 1: Planning And Preparation
Start by sketching a rough layout of your area to determine the number and placement of posts needed. This visual guide serves as a blueprint for your balustrading project.
With a tape measure in hand, precisely mark the spots on the ground or decking where each post will stand, ensuring they're evenly spaced for a harmonious look.
This doesn't just help with the appearance of your balustrade, it also aids structural integrity and helps ensure you stay in compliance with the safety standards outlined in Document K. These safety standards include the distance between balustrade posts as well as the minimum balustrade height.
Use a pencil for these marks, as they're easy to adjust or erase if needed. After marking, step back and review your layout, adjusting as necessary to ensure optimal placement. Remember, accuracy at this stage sets the tone for the entire project.
Step 2: Installing The Posts
Begin by drilling pilot holes at the marked spots, tailored to the size of your fixings and the nature of your surface. Whether you're working with wood, metal, brick, or concrete, selecting the right fixings—such as screws for wood or anchor bolts for concrete—is crucial.
When drilling, maintain a steady hand and ensure each hole is perpendicular to the surface for a straight post alignment. Once the holes are ready, position each post and secure it firmly with your chosen fixings.
It's essential to check the verticality of each post with a spirit level before final tightening to ensure they stand perfectly upright, providing a solid foundation for your balustrade.
Step 3: Attaching The Handrails
With the posts anchored securely, it's time to connect the handrails, which will tie the structure together and provide additional support. Depending on your balustrade design, you may attach the handrails using brackets or by fixing them directly to the posts.
If using brackets, position them at equal distances along the posts, ensuring they're level before securing them with screws. For direct attachment, align the handrail with the top of the posts and drill pilot holes for a precise fit.
As you attach the handrail, use a spirit level to check its alignment, ensuring it runs straight and level atop the posts. This step not only contributes to the balustrade's strength but also to its aesthetic appeal.
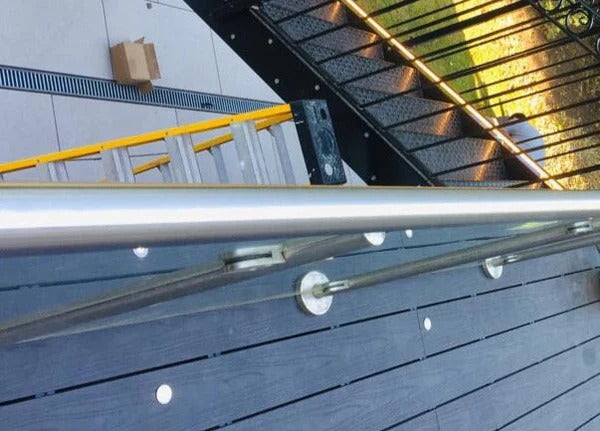
Step 4: Inserting Spindles Or Glass Panels
The process for the next step will depend on the types of balustrade materials you have. The choice between spindles and glass balustrade ideas affects the balustrade's appearance and functionality.
For spindle balustrades (such as composite balustrades), measure and mark the handrail and base rail to position the spindles evenly. Secure each spindle from the bottom up, ensuring they're perpendicular to the rails for a neat, uniform look.
For glass balustrades, prepare the clamps on the posts or base rail, adjusting them to accommodate the thickness of your glass panels. Carefully lift and slide each panel into place, checking for even spacing between them.
Tighten the clamps to hold the panels securely, but avoid over-tightening to prevent stress on the glass. This step requires patience and precision to achieve a seamless, elegant finish.
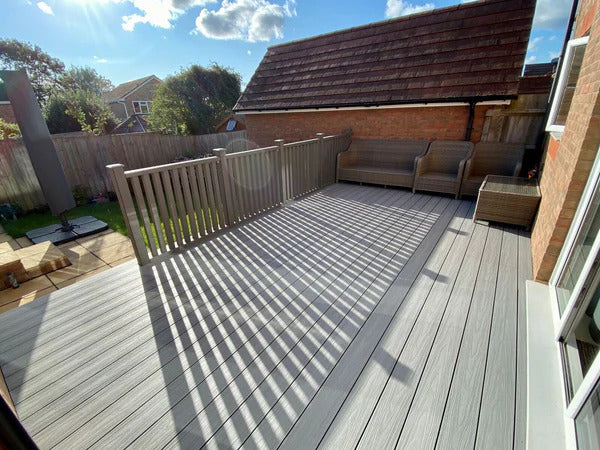
Step 5: Finishing Touches
The final touches are what truly complete your balustrade. Consider adding post caps to protect and enhance the posts' appearance. Decorative elements, such as finials or trim, can also elevate the overall design.
Once all elements are in place, take a step back and review your work with a spirit level, making any necessary adjustments to ensure perfect alignment and levelness. This is also the time to address any minor imperfections, such as tightening loose fittings or realigning slightly off-kilter posts.
With these finishing touches, your balustrade not only serves its functional purpose but also stands as a testament to your attention to detail and craftsmanship.
Conclusion
With a bit of patience and the right tools, fitting a balustrade can be a rewarding DIY project that adds both beauty and safety to your outdoor space. Remember, the key to a successful installation is in the preparation and precision.
To take your outdoor space to the next level, be sure to explore Ovaeda's premium range of outdoor balustrade materials and accessories to bring your vision to life with elegance and durability.
Fitting Balustrade (FAQs)
What materials could I use for my balustrade?
You have a few options here: composite, glass, and stainless steel are popular choices, each offering a unique aesthetic and level of maintenance.
How much do balustrades cost?
The cost can vary widely depending on the materials, design, and size of your project. Generally, you're looking at anything from a few hundred to several thousand pounds.
Can I fit a balustrade myself?
Absolutely! With the right tools, careful planning, and a bit of DIY spirit, fitting a balustrade is a project many homeowners can tackle. Just make sure to follow all safety guidelines and local building regulations.
Did our blog meet your needs? You might also find our other guides helpful:
- Can You Put Composite Decking on Wooden Joists?
- Types of Garden Flooring
- Can You Screw Composite Decking?
- Types of Composite Decking
- Best Composite Decking
- Best Price Composite Decking
- Composite vs PVC Decking
- Composite Decking Ideas UK
- Composite Decking Ideas for Small Gardens
- Outdoor Flooring Ideas Over Dirt
- Composite Decking Ideas with Steps
- Garden Decking Colour Ideas
- Does Composite Decking Get Hot?
- Does Composite Decking Fade?
- Does Composite Decking Expand?