
At Ovaeda, we're well-versed in the nuances of outdoor spaces, and we know that learning how to replace banister can significantly enhance the look and functionality of your outdoor areas.
This article is crafted to walk you through the essential tools and materials you'll need, followed by a detailed, step-by-step guide on removing the old banister and installing a new one.
We'll conclude with a section addressing frequently asked questions, ensuring you have all the knowledge at your fingertips to confidently undertake this project.
With our extensive experience in outdoor decking and accessories, we aim to provide you with professional and informative guidance, making banister replacement an achievable task for your outdoor staircase.
What this article covers:Tools & Materials Required
Before we set sail on this DIY voyage, let's ensure you've got all the necessary tools and materials. You'll need:
- External handrail
- Measuring tape
- Chisel and hammer
- Drill and bits
- Carpenter's glue
- Screws, dowels, and rail bolts
- Sandpaper
- Miter saw
- Painter's tape
- A random-orbit sander
How to Replace a Banister
Step 1: Measure
The journey to a new outdoor banister begins with precise measurements. It's essential to accurately measure the length and height of banister, as these dimensions will guide you in selecting a new one that fits perfectly.
Consider the width and depth of the handrail and the spacing between spindles, as well as the types of banisters you're working with. Ensure compliance with safety standards as outlined by Document K, especially for outdoor use where elements like weather and wear play significant roles.
In our experience, opting for a slightly longer handrail than your current measurement can provide leeway for any adjustments needed during installation, preventing the hassle of a short fit.
Step 2: Remove The Handrail & Spindles
Preparing your outdoor space for the new banister involves carefully removing the old handrail and spindles. Start by clearing the vicinity of any items that might be affected by the removal process.
Using a chisel and hammer, gently detach the handrail and spindles from their positions. It's crucial to proceed with caution to avoid damaging the staircase structure or any components you plan to repurpose.
This step might reveal hidden issues like wear in outdoor staircases, which should be addressed before proceeding with the installation of the new banister.
Step 3: Replace The Newel Post
The newel post serves as the cornerstone of your banister's stability, especially in an outdoor setting where it must withstand various weather conditions.
Removing the old newel post might require unscrewing or cutting away old fixings, and preparing the base for the new post might involve clearing away debris or old adhesive. When installing the new newel post, ensure it's anchored securely to the ground or the base of your staircase.
Using strong adhesives, bolts, or screws can provide the necessary stability, and in some cases, reinforcing the base with additional materials might be advisable for outdoor staircases.
Step 4: Prepare For The New Banister
With the newel post in place, it's time to prepare for the installation of the new banister. This involves drilling pilot holes in the newel post at the appropriate height for the handrail, ensuring they align with the handrail's fittings.
For outdoor banisters, consider using weather-resistant hardware to prevent rust and deterioration. This step sets the stage for a seamless handrail installation, ensuring that the handrail will be securely attached to the newel post, providing safety and stability for the outdoor staircase.
Step 5: Add New Spindles
Replacing banister spindles is a critical step in rejuvenating your outdoor staircase. Begin by positioning the bottom rail, ensuring it's level and securely attached to the newel post and the staircase.
Apply carpenter's glue to the base of each spindle and carefully place them into the pre-drilled holes in the bottom rail. For outdoor banisters, selecting durable materials and adhesives that can withstand the elements is crucial.
Ensure the spindles are evenly spaced and upright, providing both aesthetic appeal and structural support to the handrail.
Step 6: Attach The Handrail
Attaching the handrail is a pivotal moment in the banister replacement process. Starting from the top of the staircase, align the handrail with the newel post and the top of each spindle
As you work your way down, ensure each spindle fits snugly into the pre-drilled holes on the underside of the handrail. For outdoor staircases, using weather-resistant screws or bolts to secure the handrail to the newel post and spindles can enhance the longevity of your banister.
After putting it to the test, we've found that this step not only ensures the structural integrity of the banister but also defines the final look of your outdoor staircase.
Step 7: The Finishing Touches
With the handrail securely attached and all components in place, the final touches can begin.
Sanding the handrail and spindles smooths out any rough edges and prepares the surface for finishing treatments like paint or sealant, especially important for outdoor banisters to protect against weathering.
Inspect the entire banister for any loose fittings or imperfections, making adjustments as necessary. Applying a weather-resistant finish will not only enhance the appearance of your new banister but also ensure its durability and longevity in the outdoor environment.
Conclusion
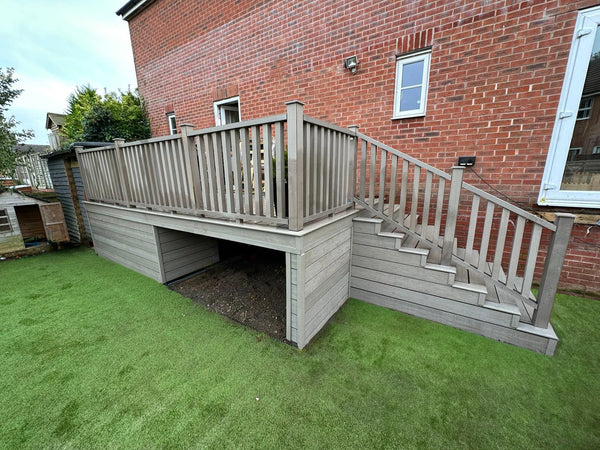
Replacing an outdoor banister is a rewarding project that not only enhances the aesthetic appeal of your outdoor space but also ensures the safety and durability of your staircase.
From taking precise measurements to the careful selection and installation of each component, every step is crucial in achieving a sturdy and stylish outcome. Remember, the right tools, materials, and a bit of patience are key to transforming your outdoor staircase into a statement feature.
For those looking to elevate their outdoor spaces with high-quality decking and accessories, Ovaeda is your go-to destination. Explore our range today and take the first step towards your staircase transformation.
How to Replace a Banister (FAQs)
Can I replace my banister myself?
Absolutely! With basic carpentry skills and a sprinkle of patience, you can give your staircase a facelift all by yourself.
What's the difference between a banister and a railing?
A banister, often called a handrail, is supported by balusters and can stand on its own, while a railing is typically secured to the wall.
What's the difference between a baluster and a spindle?
Both serve the same purpose of supporting the banister, but it's all in the design. Spindles are attached to a horizontal rail, while balusters stand on individual footings.
If you want to learn more, why not check out these articles below:
- What Is a Banister on Stairs
- Balustrade and Handrail
- Banister vs Balustrade
- Glass Balustrade Building Regulations UK
- External Balustrade Building Regulations UK
- Fitting Glass Balustrade
- Glass Balustrade Thickness
- Types of Balustrade
- Fitting Balustrade
- Balustrade Distance Between Posts
- Glass Balustrade Ideas
- Can You Put Composite Decking on Wooden Joists?
- Types of Garden Flooring
- Can You Screw Composite Decking?
- Types of Composite Decking